When it comes to choosing a reliable and encrypted email service provider in Australia, most people prefer to choose BigPond Mail. BigPond Mail, now called Telstra Mail, offers different features, allowing users to easily access their emails on different devices, and through different platforms, for example, Outlook. But configuring your BigPond mail account In Outlook can be a little confusing if you are a new user. However, you don’t need to worry about this, as we have mentioned some easy steps to get this done. If you face any issues while setting up and accessing your BigPond mail account, you can take the help of the BigPond technical support team. Now, let’s talk about the steps that you may need to follow to set up BigPond in Microsoft Outlook.
BigPond Email Setting Guide
- First of all, you need to launch the Microsoft Outlook application on your PC.
- Once done, visit the Info section and then click on the Account Settings option. If you are setting up your email for the first time, then choose the New option.
- Now, you need to choose the “Manual setup or Additional Server Tye” and then click the Next option again.
- Choose the IMAP option and click the Next button.
- Now, for the User Information, you need to enter your Telstra email ID and name.
- Add Telstra email ID and password in the Log on Information.
- Once done, you need to uncheck the “Log on using SPA or Secure Password Authentication” option.
- After that, you need to configure that server information. For this, choose IMAP as your Account type.
- Enter imap.telstra.com for the Incoming Mail Server option.
- For Outgoing Mail Server, you need to enter smtp.telstra.com.
- Choose “Use Defined” for the Mail to Keep offline option.
- Now you need to click on More Settings and then go to the Outgoing Server section.
- There, you need to click on the box stating, “My outgoing SMTP requires authentication.”
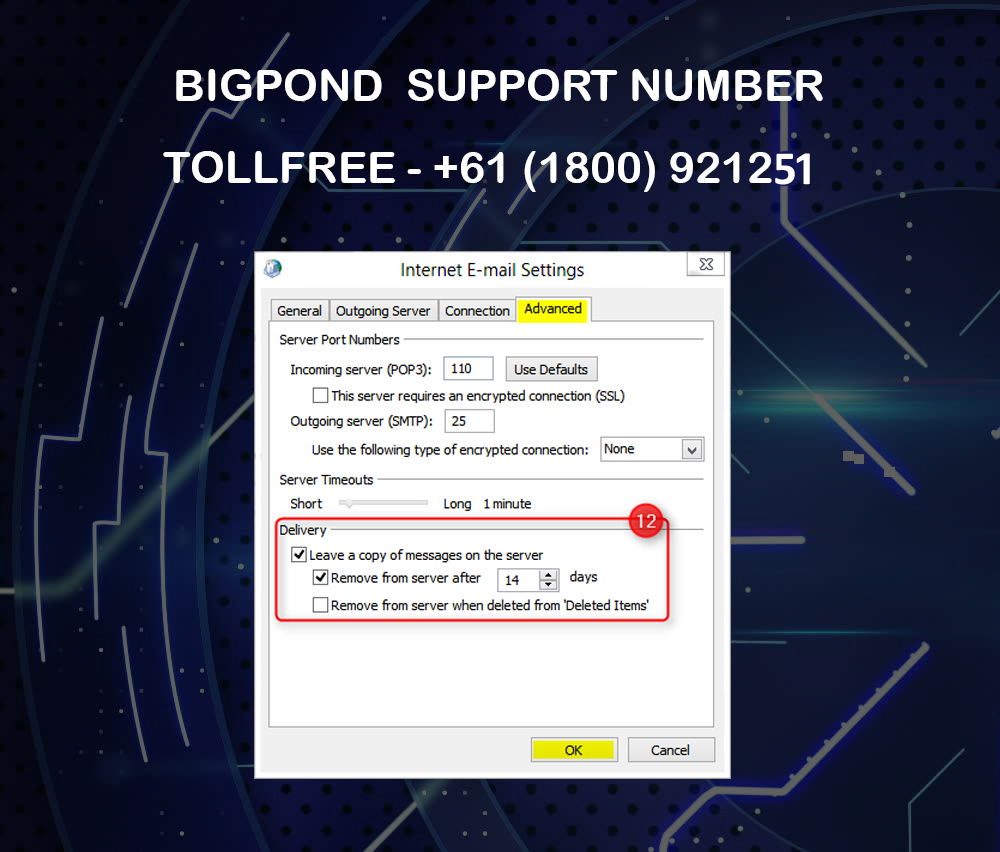
Once you are done with these steps, it’s time to Configure the Server Port Numbers. For this, you need to click on the Advanced option and then follow these steps:
- There you will find the IMAP- Internet Messaging Access Protocol. Type 933 in the available box.
- Then choose SSL for the “Use the following type of encrypted connection” option.
- For SMTP- Simple Mail Transfer Protocol, type 465.
Click on OK and then click Next. After that, Outlook will check your BigPond email configuration. After successful verification, you can close the box. Now, click on the Finish option to complete the process. Outlook will now display your emails from BigPond.
For Help, Contact the Customer Support Team
Some users may find this process complicated. So, if you are facing any issues or are stuck at a certain step, then don’t panic and contact the Bigpond Customer Support team for an instant solution.