If we look at the ways how people used to communicate in the older days, it would be through a letter or a mail. Basically, it would be letters that would take weeks or months to be delivered according to the location of delivery. But now as modern technology has developed, we don’t have to wait for days or even write letters to communicate with our contact. With just a click, the necessary message will be delivered to the required user/person. Email is a very special service which will require a web connection and computer. And after creating an account for Bigpond users can send unlimited emails. Sending emails is not just the feature offered by Bigpond as there are many more services offered by Bigpond. Learn in detail about all the features and the ways to use them. Interested users can connect with Support Service for further information.
We have been reliable in using email service for a very long time and due to its efficiency still in modern times email is the best medium for communication. As we have talked about Bigpond mail, the email client is best for faster sending and receiving emails. Users can easily manage their piled-up emails, Bigpond offers folder creation where users can store email on the preferred folder. Next users do have the privilege to store their data in cloud storage provided by Bigpond mail. The storage has limited space where users can add the storage with additional purchases. Get all the necessary details about Bigpond from Customer Care.
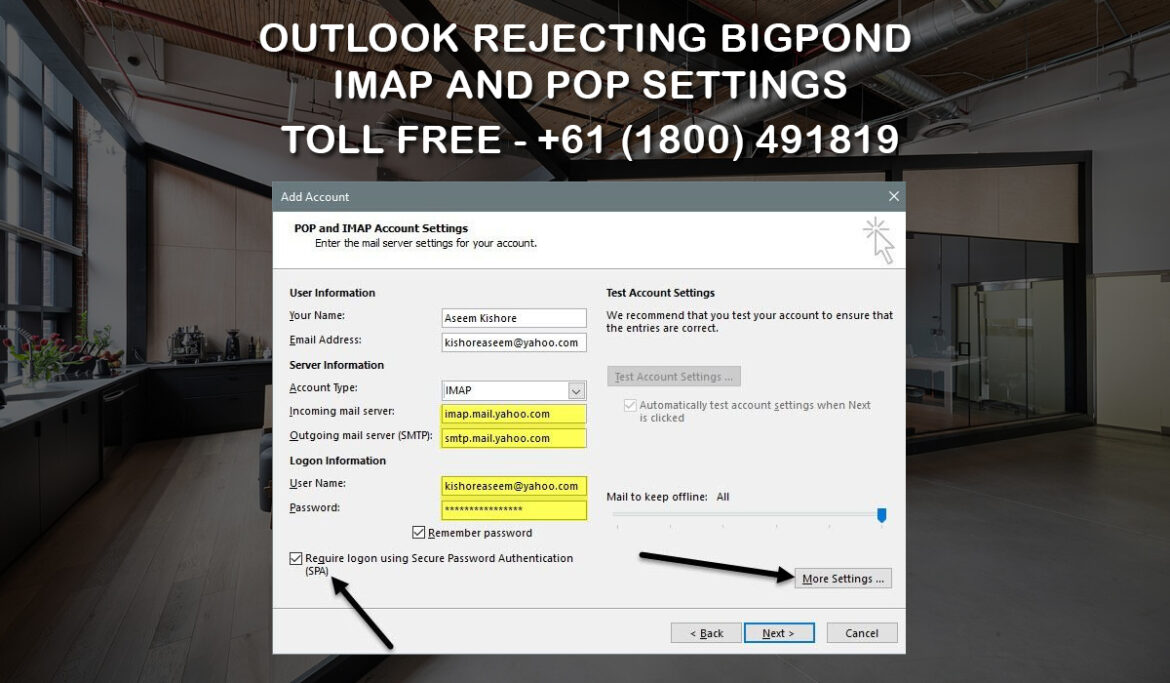
Recently there was a situation where users were having some difficulty with Bigpond mail where Outlook was not accepting Bigpond IMAP and pop settings. These sort of problems usually occurs when the data or the connection is not correctly set. Now getting into the details for the problem here could take loads of time to solve. We would better want to provide users with the proper steps to add Bigpond IMAP and pop settings on Outlook. Users will have to make certain changes as suggested and set the port and address correctly. Kindly follow the points to add Bigpond IMAP and pop setting successfully.
Make changes in the IMAP setting
- Set the account type to IMAP
- Next, incoming server address to imap.telstra.com
- Incoming server port to 993
- Encrypted connection to SSL.
- Then, the Outgoing server address to smtp.telstra.com
- Outgoing server port 465 or 587
- Make sure to turn on the SMTP authentication
- And make sure to set the encrypted connection to SSL/TLS on port 465.
After following the given point, users will be easily able to correctly set the server type on Outlook. If there is any confusion or users getting stuck with the steps again can take support for Bigpond Technical Helpline Number.