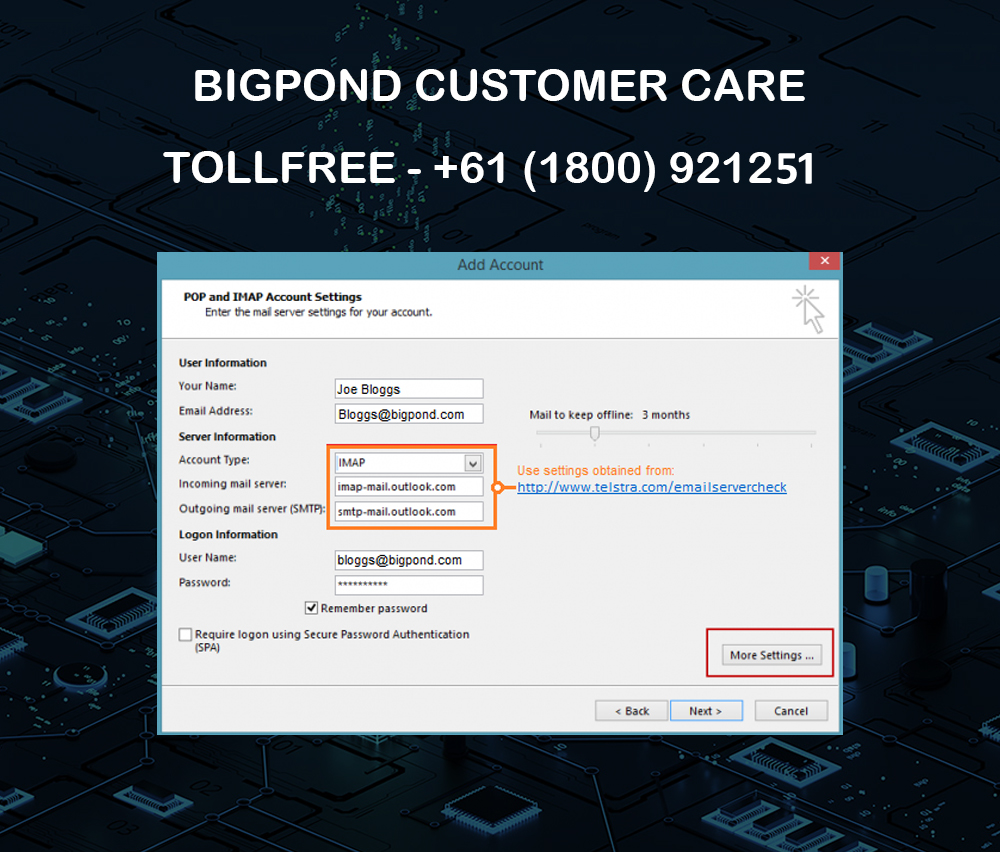
The instructions for attaching photos or files to Bigpond emails in outlook may be changed. It is because of the updates and changes in the system of Bigpond or email client. Here are some steps to be followed for attaching photos or files to Bigpond emails in outlook:
- Open Outlook: Firstly the users have to open the web browser on their computer device. Then Microsoft Outlook application should be launch.
- Username and password: The users have to enter their username and password of the email client. Make sure that username and password is correct.
- Compose a New Mail: The users have to look for a “New Mail” button. To create a new mail the users are required to click on “New mail” button.
- Address the email: After clicking on the “New mail” button the users can see the “To”, “Subject” and “Message” field. The users have to enter the recipients email address in the “To” field. Make sure that the recipients email address is correct.
- Subject and Message: In the Subject and message field the users have to enter a subject for the email and compose a message in the body.
- Attach Files: After entering a subject and composing message the users have to look for paperclip icon to attach a photo or files. This option is located in the toolbar at the top of the email.
- Browse for Files: The users have to click on the “Attach” or paperclip icon where a window will appear on the screen allowing the users to browse the computer for the files that they want to attach.
- Select the Files: The users have to navigate to the location where their photos and files are stored. Then the users have to select the files that they want to attach and click “Open” button.
- Inserting Photos Inline (Optional): If the users want to insert photos inline then they have to look for an option like “Insert” or “Inline” after attaching the files. Most of the email client will allow the users to insert photos inline.
- Finish and Send: Once the files or photos is attached then review the email to make sure everything is accurate. After reviewing the users have to click the “Send” button to send the email with the attached files.
The steps mentioned above will help the users to attach photos or files to Bigpond emails in Outlook. If more of the information is required then getting in touch with Bigpond customer care will be the best solutions.
More Info: https://www.bigpondonlineservice.com/blog/bigpond-customer-care-australia/