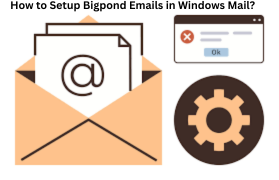
Bigpond is an email service which help users to communicate to each other for both purposes personal and business use and setting up your Bigpond email account in windows mail allow you to access all your emails in one place without need to log in through web browser and it doesn’t matter whether you are using windows 10 or window 11 there built I mail app makes it easy to manage your Bigpond emails alongside other accounts and before setting up your Bigpond email in windows mail make sure that you have your Bigpond email address and password and check incoming and outgoing server setting also and IMAP is generally recommended because it syncs emails across multiple devices and reason for why to use webmail is it is convenient and user friendly email client that comes preinstalled on windows devices and for Bigpond users integrate your account into windows mail can streamline your daily email management, so here are some steps for setup Bigpond email in windows mail and you can also ask our support team for that on Bigpond customer care.
Steps to setup Bigpond emails in windows mail:
1. First open mail app and click on start menu then search for mail if you are opening it first time then you will be directed to add an account.
2. Next click on account from the left sidebar and select add account then scroll down and click on advanced setup and choose internet email.
3. Then you have to enter your account information like email address, username, password, account name and send your message using your display name.
4. Now you have to enter server details for incoming email server – imap.telstra.com and for outgoing email server (SMTP) – smtp.telstra.com and use account type IMAP4 or make sure to check outgoing server requires authentication, use the same username and password for sending email and require SSL for incoming and outgoing email.
5. Then click on sign in and windows mail will verify your settings then once it is successful then click on done and now your Bigpond email account should now be fully setup and now ready to use.
6. When setting up your Bigpond email then you will have option to use IMAP or POP and we suggest you to choose IMAP because IMAP is the better choice of its flexibility and real time syncing.
7. Sometimes you may encounter issues while setting up your Bigpond mail account like incorrect password error for that double check your password, server connection issues for that verify server names and ports, email not syncing for that remove and read the account and adjust sync frequency, unable to send emails for that confirm SMTP settings and ensure authentication is enabled.
8. Once your Bigpond email is setup then you have to improve your experience by organizing folders, use rules for filtering incoming emails, sync regularly and keep your inbox clutter free.
9. To keep your email secure always use strong or unique password and update it regularly and also avoid using email on public Wi-fi without protection.
Setting up your BigPond email in Windows Mail is a straightforward process when you have the correct settings and followed correct steps carefully or by using IMAP and make sure that your server configurations are accurate, so you can enjoy seamless email access across your devices. Windows mail offers a simple yet powerful way to manage your emails and once your BigPond account is integrated then you will have everything you need at your fingertips whether it is for personal or business use this setup helps you to stay organized, connected and productive and now you should be able to configure your BigPond email with ease and troubleshoot any issues that arise along the way but if you tried all steps and still can’t set up your BigPond email then it may be time to seek help and for that contact your email provider’s support team in case if your account is locked, you see any unauthorized access, server settings are not working or you cannot reset your password for that go on Bigpond customer support.