Setting up Telstra Mail on Outlook for the first time allows the users to easily manage their Telstra email account as well their other email accounts. Here we mention detailed guidelines to help the users through the procedure:
- Before starting up Telstra Mail on Outlook the users must gather necessary information such as Telstra email address, password, Incoming mail server (IMAP or POP3) settings and Outgoing mail server (SMTP) settings. The users can get the configuration details on the official website of Telstra or contact Telstra customer service.
- The users have to download and install Outlook from the Microsoft website. After installing the Outlook the users should launch the program.
- In Outlook, the users have to go to the “File” option and select “Add Account” or “Add Email Account”. The users have to choose the option to set up an email account manually and press “Next”.
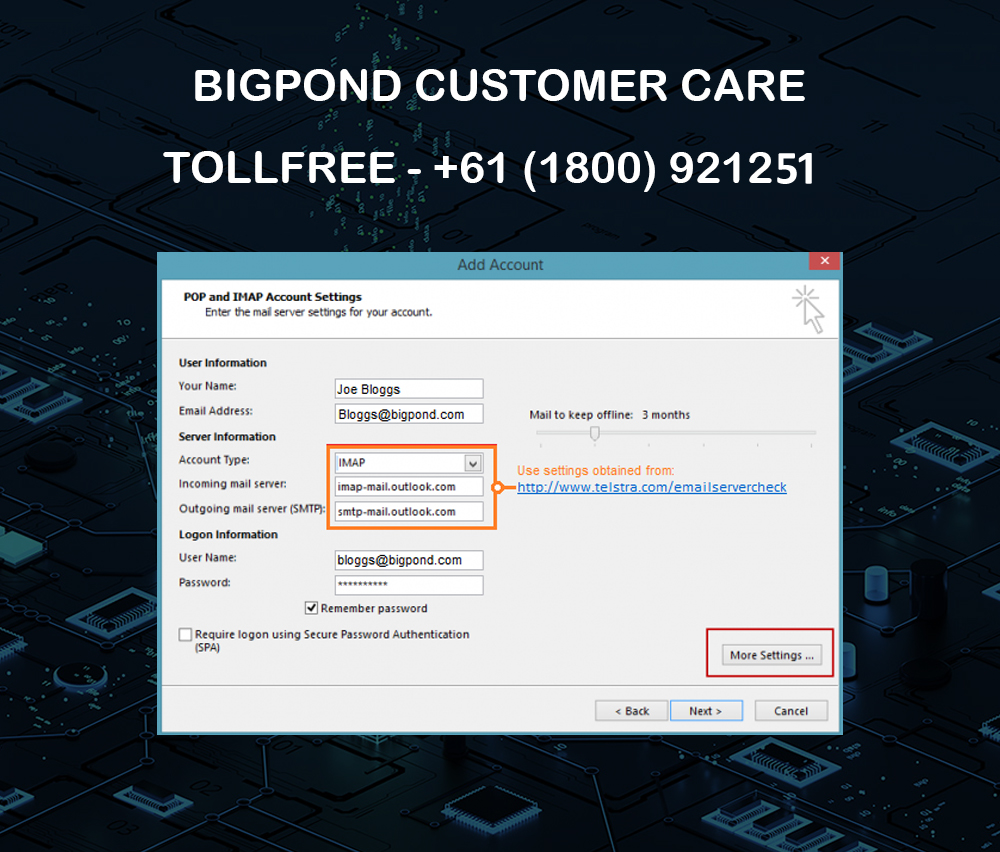
- On the “Add Account”, the users have to enter their account information (Telstra email address) and tap “Advanced options” to server settings manually.
- The account type should be either IMAP or POP3. Remember that IMAP is for syncing emails for multiple devices and POP3 is for downloading emails to the user’s device. The details for server settings are as follow:
- Use “imap.telstra.com (for IMAP) or pop.telstra.com (for POP3)” for incoming mail server (IMAP or POP3)
- Use “993 (for IMAP) or 995 (for POP3)” for incoming server port
- The Encryption method should be “SSL/TLS”
- Use “smtp.telstra.com” for Outgoing mail server (SMTP)
- Use “465” for Outgoing server port
- The Encryption method will be “SSL/TLS” only.
- The users have to check the box for “MY outgoing server (SMTP) requires authentication” and select “Use same settings as my incoming mail server”
- After the server settings are configured the users have to authenticate their account by entering their Telstra email ID and password in the provided field. The user should tap “Next” to allow Outlook to verify their account settings.
- When the Outlook verifies users account settings, Tap “Finish” to complete the setup process. To verify that the users account is properly set up, Outlook will send a test email.
- When the Telstra mail account is set up, the users can customize the additional settings such as sync frequency, folder organization and email signature.
- To check if the Telstra Mail account is working orderly in outlook the users have to send a test mail to another email account. Look in both “Inbox” and “Sent Items” folders to make sure that the emails are being sent and received properly.
By following these steps the users can set up Telstra Mail on Outlook for the first time but sometimes users may encounter issues due to updates or changes in the systems. In such a situation contact Bigpond Customer Care for more information and assistance.